


In this article, we will explain how you can enable or disable the advanced DNS Zone Editor in WHM.
When you are handling cPanel as a reseller, you can choose whether individual cPanel accounts should access the Advanced DNS Zone Editor. The Basic DNS Zone editor offers A and CNAME records without modifying default records.
The Advanced DNS Zone Editor provides A, CNAME, and TXT records, along with the ability to modify default records. As a reseller, you can enable or disable this option for all cPanels through your WebHost Manager (WHM).
Follow these steps to enable or disable the advanced DNS Zone Editor in WHM:
- Log into your WHM.
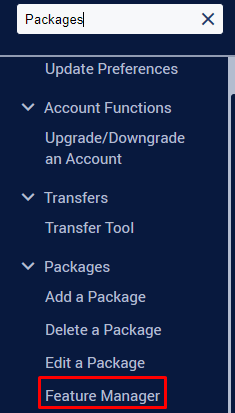
- Find the “Feature Manager” tool under the Packages category.
- This takes you to a page where you can choose the feature template list to edit. If there isn’t one, you can create a new list by giving it a name, like “Default.” Click on Add to make the feature template.
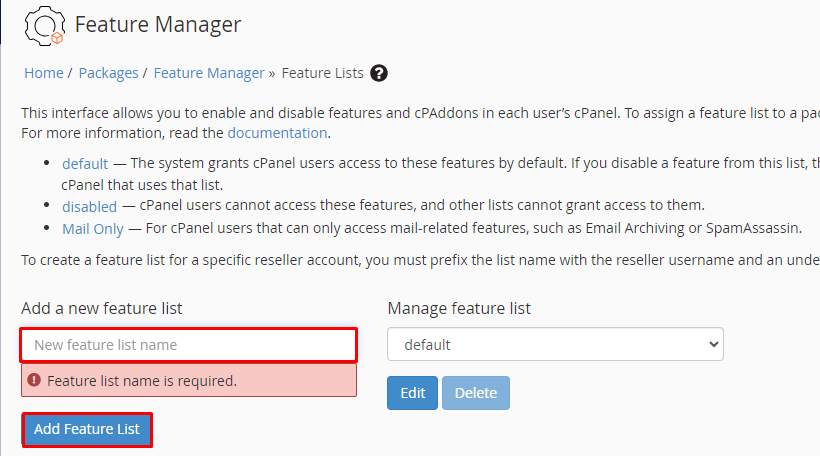
- The name of the new list will show up under the “Edit a Feature List” section. Make sure it’s chosen in the dropdown and click on the Edit button. On this page, you’ll find a list of features for accounts with this list. Choose or unchoose the checkbox next to the “Advanced DNS Zone Editor” field.

- Go to the bottom and click Save. This preserves your settings, and all accounts following this configuration will either have or not have the Advanced DNS Zone Editor as per your setup.
